nuxt
约 1298 字大约 4 分钟
nuxtvuenode
2024-08-13
webhooks-server-generator
此文章要配合项目进行食用
项目地址:https://github.com/LuckRain7/webhooks-server-generator
1. Build Setup
# install dependencies
$ npm  install

# serve with hot reload at localhost:3000
$ npm run dev

# build for production and launch server
$ npm run build
$ npm run start

# generate static project
$ npm run generate
2. 配置 ant-design-vue 按需加载
配置插件按需引入
Form表单比较特殊 需注册form-item
# plugins/antd-ui.js
import Vue from 'vue'
import Button from 'ant-design-vue/lib/button'
import Steps from 'ant-design-vue/lib/steps'
import Form from 'ant-design-vue/lib/form'
import Input from 'ant-design-vue/lib/input'

Vue.use(Button)
Vue.use(Steps) // 步骤条
Vue.use(Form)
Vue.use(Form.Item) //**
Vue.use(Input)
配置 css 按需引入(全局引入或组件内引入)
- 全局引入
# nuxt.config.js
css: [
    // 'ant-design-vue/dist/antd.css'
    // 按需引入ant-ui
    // './style/basic.less',
    './style/animate.min.css', // 过渡动画
    'ant-design-vue/lib/button/style/css',
    'ant-design-vue/lib/steps/style/css',
    'ant-design-vue/lib/form/style/css',
    'ant-design-vue/lib/input/style/css'
],- 组件内引入
<script>
import '@/node_modules/ant-design-vue/lib/button/style/index.css'
import '@/node_modules/ant-design-vue/lib/steps/style/index.css'
import '@/node_modules/ant-design-vue/lib/form/style/index.css'
import '@/node_modules/ant-design-vue/lib/input/style/index.css'

export default {}
</script>
3. 使用 Less
安装 less less-loader直接使用
yarn add less less-loader4. 路由
路由跳转(用法和 vue-router 一致)
<nuxt-link to="/">首页</nuxt-link>5. 模板视图
添加模板视图 layouts/basic.vue
<template>
  <div id="Basic">
    <nuxt />
  </div>
</template>

<style>
body,
html {
  height: 100%;
  width: 100%;
}
html {
  font-family: 'Source Sans Pro', -apple-system, BlinkMacSystemFont, 'Segoe UI',
    Roboto, 'Helvetica Neue', Arial, sans-serif;
  font-size: 16px;
  word-spacing: 1px;
  -ms-text-size-adjust: 100%;
  -webkit-text-size-adjust: 100%;
  -moz-osx-font-smoothing: grayscale;
  -webkit-font-smoothing: antialiased;
  box-sizing: border-box;
}

#__nuxt,
#__layout,
#Basic {
  height: 100%;
  width: 100%;
}

*,
*:before,
*:after {
  box-sizing: border-box;
  margin: 0;
}
</style>
在page中应用
<template>
<!-- Your template -->
</template>
<script>
export default {
  layout: 'basic'
  // page component definitions
}
</script>
6. Node 实现 ZIP 压缩文件
jszip 工具的使用
下载 jszip
yarn add jszip官网实例
var zip = new JSZip();
zip.file("Hello.txt", "Hello World\n");
var img = zip.folder("images");
img.file("smile.gif", imgData, {base64: true});
zip.generateAsync({type:"blob"})
.then(function(content) {
    // see FileSaver.js
    saveAs(content, "example.zip");
});
简单使用
const ZIP = require('jszip')

async function createZIP(data, filename) {
  //初始化 jszip
  const zip = new ZIP()

  // 读取文件内容
  const packageJSON = await readFile(getFilePath('./package.ejs'))
  const indexJSTemplate = await readFile(getFilePath('./index.ejs'))

  // index.js 模板渲染
  const renderData = {
    secret: data.secret,
    // cmd: "cd C:\\APP\\MyWorkLoad && git pull",
    cmd: `cd ${data.file} && ${data.cmd}`,
    path: data.url,
    port: data.port
  }
  const indexJS = ejs.render(indexJSTemplate, renderData)

  // 创建文件 并将数据传入文件
  zip.file('package.json', packageJSON)
  zip.file('index.js', indexJS)
  // 进行文件压缩 content即压缩后的数据
  const content = await zip.generateAsync({
    type: 'nodebuffer', // node压缩类型
    compressionOptions: {
      level: 5 // 压缩级别 1-9级
    }
  })

  // 将压缩文件存储到静态文件中
  await fs.writeFile(getFilePath(`../../static/${filename}`), content)

  return `${filename}`
}
7. 过渡动画
过渡动画基本与Vue一致
7-1. animate.css 的使用
在项目中引入 animate.css
# nuxt.config.js
css: [
    './style/animate.min.css', // 过渡动画
  ],
在页面中使用
动画类包括:enter-class、enter-active-class、enter-to-class、leave-class、leave-active-class、leave-to-class
<transition enter-active-class="animated fadeInLeft">内容</transition>7.2 自定义动画
<template>
 <transition enter-active-class="animated fadeInLeft">内容</transition>
</template>
<style>
  @-webkit-keyframes fadeInLeft {
  from {
    opacity: 0;
    -webkit-transform: translate3d(-100%, 0, 0);
    transform: translate3d(-100%, 0, 0);
  }

  to {
    opacity: 1;
    -webkit-transform: translate3d(0, 0, 0);
    transform: translate3d(0, 0, 0);
  }
}

@keyframes fadeInLeft {
  from {
    opacity: 0;
    -webkit-transform: translate3d(-100%, 0, 0);
    transform: translate3d(-100%, 0, 0);
  }

  to {
    opacity: 1;
    -webkit-transform: translate3d(0, 0, 0);
    transform: translate3d(0, 0, 0);
  }
}

.fadeInLeft {
  animation: fadeInLeft 1s infinite;
  // /*Safari 和 Chrome:*/
  -webkit-animation: fadeInLeft 1s infinite;
  animation-iteration-count: 1; //动画次数 一次
}
</style>
8. <pre>标签
pre 元素可定义预格式化的文本。被包围在 pre 元素中的文本通常会保留空格和换行符。而文本也会呈现为等宽字体。
<pre>标签的一个常见应用就是用来表示计算机的源代码。
可以导致段落断开的标签(例如标题、<p> 和 <address>标签)绝不能包含在<pre>定义的块里。尽管有些浏览器会把段落结束标签解释为简单地换行,但是这种行为在所有浏览器上并不都是一样的。
pre 元素中允许的文本可以包括物理样式和基于内容的样式变化,还有链接、图像和水平分隔线。当把其他标签(比如 <a>标签)放到 <pre>块中时,就像放在 HTML/XHTML 文档的其他部分中一样即可。
<pre>{{ code }}</pre>nuxt.js 究极按需引入 ant design vue

在网络上看了很多ui组件按需加载的案例,但是那不是我想要的
1. 首先我们看一下 错误的示范
1.1.配置插件 plugins\antd-ui.js
import Vue from 'vue'
import Button from 'ant-design-vue/lib/button'
import Steps from 'ant-design-vue/lib/steps'
import Form from 'ant-design-vue/lib/form'
import Input from 'ant-design-vue/lib/input'

Vue.use(Button)
Vue.use(Steps) // 步骤条
Vue.use(Form)
Vue.use(Form.Item)
Vue.use(Input)
1.2.引入css样式 nuxt.config.js
# nuxt.config.js

module.exports = {
  css: [
    './style/basic.less'
    'ant-design-vue/lib/button/style/index.css',
    'ant-design-vue/lib/steps/style/index.css',
    'ant-design-vue/lib/form/style/index.css',
    'ant-design-vue/lib/input/style/index.css'
  ],

  plugins: [{ src: '@/plugins/antd-ui', ssr: true }],

}
不知道大家看出错什么问题
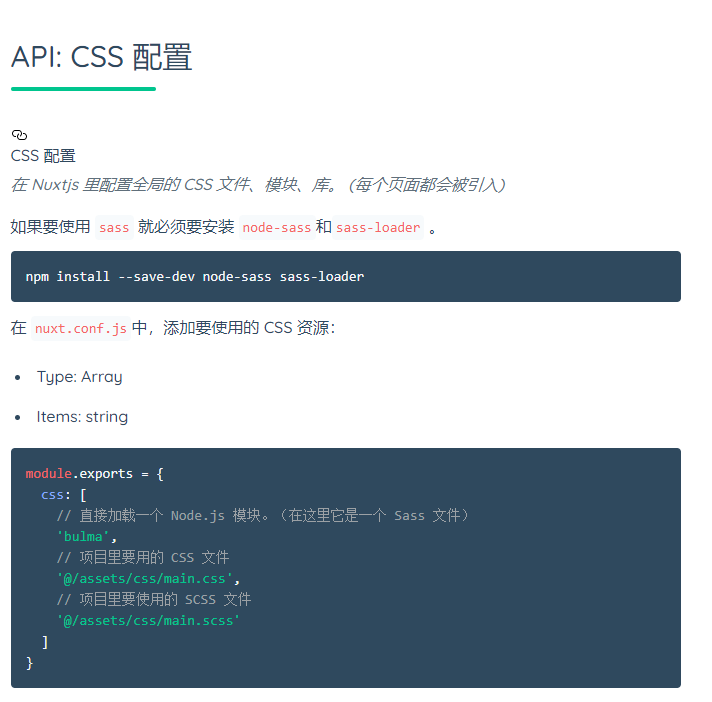
我们去官方文档中寻找一点线索

重点来喽!!!!!

css引入的样式是全局样式!!!如果这里是SPA,我觉着这OK,但是我们是SSR,需要进一步的优化
2. 真正的按需加载
我们抛弃在全局样式中进行加载,在组件中引用
<template>
  <div >
  </div>
</template>

<script>
import '@/node_modules/ant-design-vue/lib/button/style/index.css'
import '@/node_modules/ant-design-vue/lib/steps/style/index.css'
import '@/node_modules/ant-design-vue/lib/form/style/index.css'
import '@/node_modules/ant-design-vue/lib/input/style/index.css'
export default {
  components: {}
}
</script>

  }
}
</style>
虽然这样或许不是很优雅,但是这才是真正意义上的 SSR 按需加载 UI 组件
